


Distance Calculator

A 3, A3
3183.7 km, 33 h
| Head southwest | 30 m | |
| Turn right onto South End (A1138) | 200 m | |
| Merge right onto Haven Bridge (A16) | 60 m | |
| Continue onto John Adams Way (A16) | 250 m | |
| Enter the traffic circle and take the 1st exit onto Spalding Road (A16) | 5.5 m | |
| Exit the traffic circle onto Spalding Road (A16) | 1 km | |
| Enter the traffic circle and take the 2nd exit onto A16 | 25 m | |
| Exit the traffic circle onto A16 | 200 m | |
| Enter the traffic circle and take the 2nd exit onto A16 | 40 m | |
| Exit the traffic circle onto A16 | 1 km | |
| Enter the traffic circle and take the 2nd exit onto A16 | 60 m | |
| Exit the traffic circle onto A16 | 3.5 km | |
| Enter the traffic circle and take the 2nd exit onto A16 | 25 m | |
| Exit the traffic circle onto A16 | 4.5 km | |
| Enter Sutterton Roundabout and take the 2nd exit onto A16 | 55 m | |
| Exit the traffic circle onto A16 | 5.5 km | |
| Enter the traffic circle and take the 1st exit onto A16 | 20 m | |
| Exit the traffic circle onto A16 | 4 km | |
| Enter the traffic circle and take the 1st exit onto Spalding Bypass (A16) | 30 m | |
| Exit the traffic circle onto Spalding Bypass (A16) | 2 km | |
| Enter Springfields Roundabout and take the 2nd exit onto Spalding Bypass (A16) | 50 m | |
| Exit the traffic circle onto Spalding Bypass (A16) | 1 km | |
| Enter the traffic circle and take the 2nd exit onto Spalding Bypass (A16) | 40 m | |
| Exit the traffic circle onto Spalding Bypass (A16) | 4 km | |
| Enter the traffic circle and take the 1st exit onto Crowland Bypass (A16) | 8 m | |
| Exit the traffic circle onto Crowland Bypass (A16) | 3 km | |
| Enter the traffic circle and take the 2nd exit onto Crowland Bypass (A16) | 45 m | |
| Exit the traffic circle onto Crowland Bypass (A16) | 10 km | |
| Enter the traffic circle and take the 2nd exit onto A16 | 55 m | |
| Exit the traffic circle onto A16 | 3.5 km | |
| Enter the traffic circle and take the 2nd exit onto A16 | 50 m | |
| Exit the traffic circle onto A16 | 4 km | |
| Enter the traffic circle and take the 3rd exit onto Eye Road (A47) | 100 m | |
| Exit the traffic circle onto Eye Road (A47) | 450 m | |
| Enter Dogsthorpe Roundabout and take the 2nd exit onto Soke Parkway (A47) | 150 m | |
| Exit the traffic circle onto Soke Parkway (A47) | 6 km | |
| Take the ramp on the left onto A47 | 200 m | |
| Keep left onto A47 | 200 m | |
| Merge right onto Nene Parkway (A1260) | 3.5 km | |
| Enter Hampton Roundabout and take the 3rd exit | 250 m | |
| Exit the traffic circle | 350 m | |
| Merge right onto Fletton Parkway (A1139) | 3.5 km | |
| Take the ramp on the left towards A1(M): The SOUTH | 450 m | |
| Merge right onto Great North Road (A1(M)) | 15 km | |
| Keep right onto A1(M) | 7 km | |
| Take the ramp on the left onto A14 | 25 km | |
| Keep right onto Huntingdon Road (A14) | 550 m | |
| Continue onto M11 | 70 km | |
| Take the ramp on the left towards M25 | 400 m | |
| Keep left towards M25: (M20 | 450 m | |
| Keep left towards M25: (M20 | 25 km | |
| Continue towards M25: (M20 | 8 km | |
| Take the ramp on the left towards A2: (M2) Canterbury | 1.5 km | |
| Merge right onto Dartford Bypass (A2) | 3 km | |
| Continue onto Watling Street (A2) | 10 km | |
| Continue onto M2 | 9 km | |
| Take the ramp on the left onto M2 | 600 m | |
| Enter Taddington Roundabout and take the 3rd exit onto A229 | 250 m | |
| Exit the traffic circle onto A229 | 350 m | |
| Enter Lord Lees Roundabout and take the 1st exit | 5 m | |
| Exit the traffic circle | 300 m | |
| Continue onto A229 | 3 km | |
| Take the ramp on the left | 500 m | |
| Keep right at the fork | 100 m | |
| Enter Cobtree Roundabout and take the 1st exit towards Ashford | 8 m | |
| Exit the traffic circle towards Ashford | 50 km | |
| Take the ramp on the left towards Channel Tunnel | 400 m | |
| Keep right at the fork | 1.5 km | |
| Go straight onto FlexiPlus | 250 m | |
| Continue onto Boulevard d'Erlanger | 800 m | |
| Keep right at the fork | 15 m | |
| Keep right at the fork | 900 m | |
| Continue onto Over Bridge 2 | 200 m | |
| Turn left | 90 m | |
| Make a slight right | 20 m | |
| Take the ferry Le Shuttle | 60 km | |
| Make a slight right | 150 m | |
| Turn right | 1 km | |
| Keep right towards Calais Centre | 1 km | |
| Enter Giratoire du Chantier du Siècle and take the 1st exit onto Boulevard de l'Europe | 25 m | |
| Exit the traffic circle onto Boulevard de l'Europe | 900 m | |
| Enter Giratoire de l'Europe and take the 2nd exit towards A 16 | 100 m | |
| Exit the traffic circle towards A 16 | 200 m | |
| Enter the traffic circle and take the 1st exit towards Dunkerque | 30 m | |
| Exit the traffic circle towards Dunkerque | 400 m | |
| Merge left onto L'Européenne (A 16) | 45 km | |
| Keep left towards Ostende | 10 km | |
| Continue onto E40 | 150 km | |
| Take the ramp towards Namen | 450 m | |
| Keep left towards Namen | 900 m | |
| Keep left towards Namen | 250 m | |
| Merge left onto R0 | 20 km | |
| Take the ramp towards E40: Luik | 200 m | |
| Keep left towards E40: Luik | 1.5 km | |
| Merge left onto E40 | 80 km | |
| Keep left towards E40: Aachen | 50 km | |
| Continue onto A 44 | 10 km | |
| Take the ramp towards A 4: Antwerpen | 300 m | |
| Keep left towards A 4: Köln | 700 m | |
| Merge left onto A 4 | 70 km | |
| Take the ramp towards A 559: Bonn | 700 m | |
| Merge left onto A 559 | 3.5 km | |
| Merge right onto A 59 | 2 km | |
| Take exit 34 towards Köln-Bonn | 100 m | |
| Keep left towards Köln-Bonn | 350 m | |
| Keep left towards A 59: Bonn | 350 m | |
| Merge left onto A 59 | 10 km | |
| Take the ramp towards A 560: Frankfurt am Main | 900 m | |
| Continue towards A 560 | 6 km | |
| Take the ramp towards A 3: Köln | 300 m | |
| Keep right towards A 3: Frankfurt am Main | 350 m | |
| Merge left onto A 3 | 250 km | |
| Take the ramp onto A 3 | 350 m | |
| Keep left towards A 3 | 450 m | |
| Keep left towards A 3: Nürnberg | 1.5 km | |
| Keep left towards A 7: Nürnberg | 400 m | |
| Keep left towards A 3: Nürnberg | 350 km | |
| Continue onto Innkreis Autobahn (A8) | 60 km | |
| Take the ramp towards Graz | 15 km | |
| Continue onto Pyhrn Autobahn (A9) | 250 km | |
| Continue onto A1 | 25 km | |
| Take the ramp towards Zagreb (HR) | 1.5 km | |
| Continue onto A4 | 35 km | |
| Continue onto A2 | 60 km | |
| Take the ramp towards A3: Ljubljana | 80 m | |
| Keep left towards Zagreb zapad | 300 m | |
| Keep left towards A3: Slavonski Brod | 300 km | |
| Take the ramp | 550 m | |
| Merge left onto A3 | 300 m | |
| Turn right | 80 m | |
| Turn left | 70 m | |
| Take the ramp on the right | 450 m | |
| Merge left onto A3 | 90 km | |
| Keep left towards A 1: Sofia(BG) | 2.5 km | |
| Merge right onto Обилазница око Београда (A1) | 30 km | |
| Keep left towards A 1: Skopje | 200 km | |
| Take the ramp towards A4: Sofia (BG) | 1.5 km | |
| Continue onto A4 | 100 km | |
| Continue onto Автомагистрала Европа (A 6) | 35 km | |
| Keep left towards 8 | 15 km | |
| Enter the traffic circle and take the 3rd exit towards Видин | 150 m | |
| Exit the traffic circle towards Видин | 350 m | |
| Take the ramp on the left towards Видин | 100 m | |
| Merge left onto Околовръстен път (8) | 4 km | |
| Take exit 49 towards А 6: Варна | 1 km | |
| Merge left onto Автомагистрала Европа (A 6) | 15 km | |
| Keep right towards А 1: Пловдив | 1.5 km | |
| Merge left onto Околовръстен път (1) | 8 km | |
| Take the ramp towards A 1: Пловдив | 350 m | |
| Merge left onto Автомагистрала Тракия (A 1) | 150 km | |
| Keep right towards А 4: Свиленград | 100 km | |
| Keep left towards Turkey | 500 m | |
| Continue onto Kapıkule Sınır Kapısı (D-100) | 10 km | |
| Keep left towards Lalapaşa | 250 km | |
| Keep right towards Bağcılar | 9 km | |
| Continue onto Adnan Menderes Vatan Bulvarı | 300 m | |
| Make a slight right | 90 m | |
| Continue onto Çayır Meydanı Caddesi | 250 m | |
| Turn right onto Bican Bağcıoğlu Yokuşu | 35 m | |
| Make a slight left onto Tatlı Pınar Caddesi | 150 m | |
| Turn left onto Gureba Hastanesi Caddesi | 900 m | |
| Turn left onto Oğuzhan Caddesi | 100 m | |
| Continue onto Akdeniz Caddesi | 600 m | |
| Turn right onto Fevzipaşa Caddesi | 350 m | |
| Continue onto Macar Kardeşler Caddesi | 450 m | |
| Continue towards Vezneciler | 150 m | |
| You have arrived at your destination, on the right | 0 m |
A 8, A3
3219.9 km, 33 h
| Head southwest | 30 m | |
| Turn right onto South End (A1138) | 200 m | |
| Merge right onto Haven Bridge (A16) | 60 m | |
| Continue onto John Adams Way (A16) | 250 m | |
| Enter the traffic circle and take the 1st exit onto Spalding Road (A16) | 5.5 m | |
| Exit the traffic circle onto Spalding Road (A16) | 1 km | |
| Enter the traffic circle and take the 2nd exit onto A16 | 25 m | |
| Exit the traffic circle onto A16 | 200 m | |
| Enter the traffic circle and take the 2nd exit onto A16 | 40 m | |
| Exit the traffic circle onto A16 | 1 km | |
| Enter the traffic circle and take the 2nd exit onto A16 | 60 m | |
| Exit the traffic circle onto A16 | 3.5 km | |
| Enter the traffic circle and take the 2nd exit onto A16 | 25 m | |
| Exit the traffic circle onto A16 | 4.5 km | |
| Enter Sutterton Roundabout and take the 2nd exit onto A16 | 55 m | |
| Exit the traffic circle onto A16 | 5.5 km | |
| Enter the traffic circle and take the 1st exit onto A16 | 20 m | |
| Exit the traffic circle onto A16 | 4 km | |
| Enter the traffic circle and take the 1st exit onto Spalding Bypass (A16) | 30 m | |
| Exit the traffic circle onto Spalding Bypass (A16) | 2 km | |
| Enter Springfields Roundabout and take the 2nd exit onto Spalding Bypass (A16) | 50 m | |
| Exit the traffic circle onto Spalding Bypass (A16) | 1 km | |
| Enter the traffic circle and take the 2nd exit onto Spalding Bypass (A16) | 40 m | |
| Exit the traffic circle onto Spalding Bypass (A16) | 4 km | |
| Enter the traffic circle and take the 1st exit onto Crowland Bypass (A16) | 8 m | |
| Exit the traffic circle onto Crowland Bypass (A16) | 3 km | |
| Enter the traffic circle and take the 2nd exit onto Crowland Bypass (A16) | 45 m | |
| Exit the traffic circle onto Crowland Bypass (A16) | 10 km | |
| Enter the traffic circle and take the 2nd exit onto A16 | 55 m | |
| Exit the traffic circle onto A16 | 3.5 km | |
| Enter the traffic circle and take the 2nd exit onto A16 | 50 m | |
| Exit the traffic circle onto A16 | 4 km | |
| Enter the traffic circle and take the 3rd exit onto Eye Road (A47) | 100 m | |
| Exit the traffic circle onto Eye Road (A47) | 450 m | |
| Enter Dogsthorpe Roundabout and take the 2nd exit onto Soke Parkway (A47) | 150 m | |
| Exit the traffic circle onto Soke Parkway (A47) | 6 km | |
| Take the ramp on the left onto A47 | 200 m | |
| Keep left onto A47 | 200 m | |
| Merge right onto Nene Parkway (A1260) | 3.5 km | |
| Enter Hampton Roundabout and take the 3rd exit | 250 m | |
| Exit the traffic circle | 350 m | |
| Merge right onto Fletton Parkway (A1139) | 3.5 km | |
| Take the ramp on the left towards A1(M): The SOUTH | 450 m | |
| Merge right onto Great North Road (A1(M)) | 15 km | |
| Keep right onto A1(M) | 7 km | |
| Take the ramp on the left onto A14 | 25 km | |
| Keep right onto Huntingdon Road (A14) | 550 m | |
| Continue onto M11 | 70 km | |
| Take the ramp on the left towards M25 | 400 m | |
| Keep left towards M25: (M20 | 450 m | |
| Keep left towards M25: (M20 | 25 km | |
| Continue towards M25: (M20 | 8 km | |
| Take the ramp on the left towards A2: (M2) Canterbury | 1.5 km | |
| Merge right onto Dartford Bypass (A2) | 3 km | |
| Continue onto Watling Street (A2) | 10 km | |
| Continue onto M2 | 9 km | |
| Take the ramp on the left onto M2 | 600 m | |
| Enter Taddington Roundabout and take the 3rd exit onto A229 | 250 m | |
| Exit the traffic circle onto A229 | 350 m | |
| Enter Lord Lees Roundabout and take the 1st exit | 5 m | |
| Exit the traffic circle | 300 m | |
| Continue onto A229 | 3 km | |
| Take the ramp on the left | 500 m | |
| Keep right at the fork | 100 m | |
| Enter Cobtree Roundabout and take the 1st exit towards Ashford | 8 m | |
| Exit the traffic circle towards Ashford | 50 km | |
| Take the ramp on the left towards Channel Tunnel | 400 m | |
| Keep right at the fork | 1.5 km | |
| Go straight onto FlexiPlus | 250 m | |
| Continue onto Boulevard d'Erlanger | 800 m | |
| Keep right at the fork | 15 m | |
| Keep right at the fork | 900 m | |
| Continue onto Over Bridge 2 | 200 m | |
| Turn left | 90 m | |
| Make a slight right | 20 m | |
| Take the ferry Le Shuttle | 60 km | |
| Make a slight right | 150 m | |
| Turn right | 1 km | |
| Keep right towards Calais Centre | 1 km | |
| Enter Giratoire du Chantier du Siècle and take the 1st exit onto Boulevard de l'Europe | 25 m | |
| Exit the traffic circle onto Boulevard de l'Europe | 900 m | |
| Enter Giratoire de l'Europe and take the 2nd exit towards A 16 | 100 m | |
| Exit the traffic circle towards A 16 | 200 m | |
| Enter the traffic circle and take the 1st exit towards Dunkerque | 30 m | |
| Exit the traffic circle towards Dunkerque | 400 m | |
| Merge left onto L'Européenne (A 16) | 4 km | |
| Take the ramp towards St Omer | 900 m | |
| Merge right onto Autoroute des Anglais (A 26) | 250 km | |
| Merge left onto Autoroute de l’Est (A 4) | 200 km | |
| Keep left towards St Avold | 40 km | |
| Keep left towards A 4: Sarreguemines | 100 km | |
| Keep right towards A 4: Schiltigheim | 1 km | |
| Take the ramp towards A 35: Karlsruhe | 1 km | |
| Continue onto A 35 | 30 km | |
| Take the ramp towards Karlsruhe | 350 m | |
| Continue onto D 504 | 800 m | |
| Enter the traffic circle and take the 2nd exit towards A 5: Karlsruhe | 40 m | |
| Exit the traffic circle towards A 5: Karlsruhe | 2.5 km | |
| Enter the traffic circle and take the 1st exit towards A 5: Karlsruhe | 45 m | |
| Exit the traffic circle towards A 5: Karlsruhe | 1 km | |
| Continue onto B 500 | 6 km | |
| Take the ramp towards A 5: Karlsruhe | 400 m | |
| Keep left towards A 5: Mannheim | 550 m | |
| Merge left onto A 5 | 30 km | |
| Take the ramp towards A 8: München | 250 km | |
| Keep right towards A 99: Salzburg | 45 km | |
| Take the ramp towards A 8: Salzburg | 3 km | |
| Merge left towards Salzburg | 100 km | |
| Continue onto West Autobahn (A1) | 2 km | |
| Take exit 298 towards A10: Salzburg-Süd | 1.5 km | |
| Continue onto Tauern Autobahn (A10) | 25 km | |
| Continue onto Ofenauer Tunnel (A10) | 1.5 km | |
| Continue onto Salzachbrücke Paß Lueg (A10) | 150 m | |
| Continue onto Hiefler Tunnel (A10) | 2 km | |
| Continue onto Tauern Autobahn (A10) | 150 km | |
| Continue towards A11 | 15 km | |
| Take the ramp | 600 m | |
| Merge left onto Karawanken Autobahn (A11) | 900 m | |
| Continue onto Talübergang Gratschützenbach (A11) | 150 m | |
| Continue onto Karawankentunnel (A11) | 4.5 km | |
| Continue onto Predor Karavanke (A2) | 70 km | |
| Keep left towards A1: Gradec | 900 m | |
| Continue towards Gradec | 250 m | |
| Continue onto Dolgi most (A1) | 300 m | |
| Continue onto Južna obvoznica (A1) | 8 km | |
| Keep right towards A2: Zagreb | 100 km | |
| Continue onto A3 | 300 km | |
| Take the ramp | 550 m | |
| Merge left onto A3 | 300 m | |
| Turn right | 80 m | |
| Turn left | 70 m | |
| Take the ramp on the right | 450 m | |
| Merge left onto A3 | 90 km | |
| Keep left towards A 1: Sofia(BG) | 2.5 km | |
| Merge right onto Обилазница око Београда (A1) | 30 km | |
| Keep left towards A 1: Skopje | 200 km | |
| Take the ramp towards A4: Sofia (BG) | 1.5 km | |
| Continue onto A4 | 100 km | |
| Continue onto Автомагистрала Европа (A 6) | 35 km | |
| Keep left towards 8 | 15 km | |
| Enter the traffic circle and take the 3rd exit towards Видин | 150 m | |
| Exit the traffic circle towards Видин | 350 m | |
| Take the ramp on the left towards Видин | 100 m | |
| Merge left onto Околовръстен път (8) | 4 km | |
| Take exit 49 towards А 6: Варна | 1 km | |
| Merge left onto Автомагистрала Европа (A 6) | 15 km | |
| Keep right towards А 1: Пловдив | 1.5 km | |
| Merge left onto Околовръстен път (1) | 8 km | |
| Take the ramp towards A 1: Пловдив | 350 m | |
| Merge left onto Автомагистрала Тракия (A 1) | 150 km | |
| Keep right towards А 4: Свиленград | 100 km | |
| Keep left towards Turkey | 500 m | |
| Continue onto Kapıkule Sınır Kapısı (D-100) | 10 km | |
| Keep left towards Lalapaşa | 250 km | |
| Keep right towards Bağcılar | 9 km | |
| Continue onto Adnan Menderes Vatan Bulvarı | 300 m | |
| Make a slight right | 90 m | |
| Continue onto Çayır Meydanı Caddesi | 250 m | |
| Turn right onto Bican Bağcıoğlu Yokuşu | 35 m | |
| Make a slight left onto Tatlı Pınar Caddesi | 150 m | |
| Turn left onto Gureba Hastanesi Caddesi | 900 m | |
| Turn left onto Oğuzhan Caddesi | 100 m | |
| Continue onto Akdeniz Caddesi | 600 m | |
| Turn right onto Fevzipaşa Caddesi | 350 m | |
| Continue onto Macar Kardeşler Caddesi | 450 m | |
| Continue towards Vezneciler | 150 m | |
| You have arrived at your destination, on the right | 0 m |
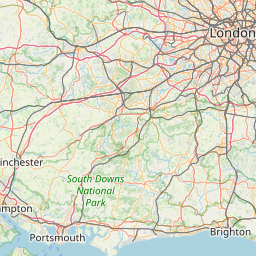
A16, A1(M)
189.7 km, 2 h 38 min
| Head southwest | 30 m | |
| Turn right onto South End (A1138) | 200 m | |
| Merge right onto Haven Bridge (A16) | 60 m | |
| Continue onto John Adams Way (A16) | 250 m | |
| Enter the traffic circle and take the 1st exit onto Spalding Road (A16) | 5.5 m | |
| Exit the traffic circle onto Spalding Road (A16) | 1 km | |
| Enter the traffic circle and take the 2nd exit onto A16 | 25 m | |
| Exit the traffic circle onto A16 | 200 m | |
| Enter the traffic circle and take the 2nd exit onto A16 | 40 m | |
| Exit the traffic circle onto A16 | 1 km | |
| Enter the traffic circle and take the 2nd exit onto A16 | 60 m | |
| Exit the traffic circle onto A16 | 3.5 km | |
| Enter the traffic circle and take the 2nd exit onto A16 | 25 m | |
| Exit the traffic circle onto A16 | 4.5 km | |
| Enter Sutterton Roundabout and take the 2nd exit onto A16 | 55 m | |
| Exit the traffic circle onto A16 | 5.5 km | |
| Enter the traffic circle and take the 1st exit onto A16 | 20 m | |
| Exit the traffic circle onto A16 | 4 km | |
| Enter the traffic circle and take the 1st exit onto Spalding Bypass (A16) | 30 m | |
| Exit the traffic circle onto Spalding Bypass (A16) | 2 km | |
| Enter Springfields Roundabout and take the 2nd exit onto Spalding Bypass (A16) | 50 m | |
| Exit the traffic circle onto Spalding Bypass (A16) | 1 km | |
| Enter the traffic circle and take the 2nd exit onto Spalding Bypass (A16) | 40 m | |
| Exit the traffic circle onto Spalding Bypass (A16) | 4 km | |
| Enter the traffic circle and take the 1st exit onto Crowland Bypass (A16) | 8 m | |
| Exit the traffic circle onto Crowland Bypass (A16) | 3 km | |
| Enter the traffic circle and take the 2nd exit onto Crowland Bypass (A16) | 45 m | |
| Exit the traffic circle onto Crowland Bypass (A16) | 10 km | |
| Enter the traffic circle and take the 2nd exit onto A16 | 55 m | |
| Exit the traffic circle onto A16 | 3.5 km | |
| Enter the traffic circle and take the 2nd exit onto A16 | 50 m | |
| Exit the traffic circle onto A16 | 4 km | |
| Enter the traffic circle and take the 3rd exit onto Eye Road (A47) | 100 m | |
| Exit the traffic circle onto Eye Road (A47) | 450 m | |
| Enter Dogsthorpe Roundabout and take the 2nd exit onto Soke Parkway (A47) | 150 m | |
| Exit the traffic circle onto Soke Parkway (A47) | 6 km | |
| Take the ramp on the left onto A47 | 200 m | |
| Keep left onto A47 | 200 m | |
| Merge right onto Nene Parkway (A1260) | 3.5 km | |
| Enter Hampton Roundabout and take the 3rd exit | 250 m | |
| Exit the traffic circle | 350 m | |
| Merge right onto Fletton Parkway (A1139) | 3.5 km | |
| Take the ramp on the left towards A1(M): The SOUTH | 450 m | |
| Merge right onto Great North Road (A1(M)) | 15 km | |
| Keep right onto A1(M) | 10 km | |
| Enter Buckden Roundabout and take the 2nd exit onto A1 | 55 m | |
| Exit the traffic circle onto A1 | 15 km | |
| Turn left to stay on Great North Road (A1) | 3.5 km | |
| Continue onto Tempsford Road (A1) | 3 km | |
| Enter Sandy Roundabout and take the 2nd exit onto Great North Road (A1) | 50 m | |
| Exit the traffic circle onto Great North Road (A1) | 4 km | |
| Continue onto Biggleswade Bypass (A1) | 500 m | |
| Enter Biggleswade North Roundabout and take the 2nd exit onto Biggleswade Bypass (A1) | 55 m | |
| Exit the traffic circle onto Biggleswade Bypass (A1) | 3.5 km | |
| Enter Biggleswade South Roundabout and take the 2nd exit onto London Road (A1) | 70 m | |
| Exit the traffic circle onto London Road (A1) | 50 km | |
| Enter Stirling Corner and take the 2nd exit onto Barnet Way (A1) | 100 m | |
| Exit the traffic circle onto Barnet Way (A1) | 2.5 km | |
| Take the ramp towards A1(S) | 900 m | |
| Enter Mill Hill Circus and take the 2nd exit onto Watford Way (A1) | 50 m | |
| Exit the traffic circle onto Watford Way (A1) | 2 km | |
| Keep right onto Watford Way (A1) | 60 m | |
| Keep left onto Watford Way (A41) | 2.5 km | |
| Continue onto Hendon Way (A41) | 3.5 km | |
| Turn right onto Finchley Road (A41) | 2.5 km | |
| Continue slightly left onto Avenue Road (A41) | 150 m | |
| Keep right onto Avenue Road (B525) | 1 km | |
| Turn right onto Outer Circle | 1 km | |
| Make a slight right onto Baker Street | 90 m | |
| Turn left onto Allsop Place | 300 m | |
| Turn left onto Marylebone Road (A501) | 550 m | |
| Turn right onto Park Crescent (A4201) | 150 m | |
| Turn right onto Portland Place (A4201) | 550 m | |
| Continue onto Langham Place (A4201) | 150 m | |
| Continue onto Regent Street (A4201) | 1 km | |
| Turn left to stay on Regent Street (A4201) | 200 m | |
| Turn right onto Haymarket (A4) | 250 m | |
| Keep straight onto Haymarket (A4) | 45 m | |
| Turn left onto Pall Mall East (A4) | 150 m | |
| Continue onto Trafalgar Square (A4) | 150 m | |
| Enter Charing Cross and exit onto Charing Cross | 80 m | |
| You have arrived at your destination | 0 m |
A16, M11
210.9 km, 2 h 49 min
| Head southwest | 30 m | |
| Turn right onto South End (A1138) | 200 m | |
| Merge right onto Haven Bridge (A16) | 60 m | |
| Continue onto John Adams Way (A16) | 250 m | |
| Enter the traffic circle and take the 1st exit onto Spalding Road (A16) | 5.5 m | |
| Exit the traffic circle onto Spalding Road (A16) | 1 km | |
| Enter the traffic circle and take the 2nd exit onto A16 | 25 m | |
| Exit the traffic circle onto A16 | 200 m | |
| Enter the traffic circle and take the 2nd exit onto A16 | 40 m | |
| Exit the traffic circle onto A16 | 1 km | |
| Enter the traffic circle and take the 2nd exit onto A16 | 60 m | |
| Exit the traffic circle onto A16 | 3.5 km | |
| Enter the traffic circle and take the 2nd exit onto A16 | 25 m | |
| Exit the traffic circle onto A16 | 4.5 km | |
| Enter Sutterton Roundabout and take the 2nd exit onto A16 | 55 m | |
| Exit the traffic circle onto A16 | 5.5 km | |
| Enter the traffic circle and take the 1st exit onto A16 | 20 m | |
| Exit the traffic circle onto A16 | 4 km | |
| Enter the traffic circle and take the 1st exit onto Spalding Bypass (A16) | 30 m | |
| Exit the traffic circle onto Spalding Bypass (A16) | 2 km | |
| Enter Springfields Roundabout and take the 2nd exit onto Spalding Bypass (A16) | 50 m | |
| Exit the traffic circle onto Spalding Bypass (A16) | 1 km | |
| Enter the traffic circle and take the 2nd exit onto Spalding Bypass (A16) | 40 m | |
| Exit the traffic circle onto Spalding Bypass (A16) | 4 km | |
| Enter the traffic circle and take the 1st exit onto Crowland Bypass (A16) | 8 m | |
| Exit the traffic circle onto Crowland Bypass (A16) | 3 km | |
| Enter the traffic circle and take the 2nd exit onto Crowland Bypass (A16) | 45 m | |
| Exit the traffic circle onto Crowland Bypass (A16) | 10 km | |
| Enter the traffic circle and take the 2nd exit onto A16 | 55 m | |
| Exit the traffic circle onto A16 | 3.5 km | |
| Enter the traffic circle and take the 2nd exit onto A16 | 50 m | |
| Exit the traffic circle onto A16 | 4 km | |
| Enter the traffic circle and take the 3rd exit onto Eye Road (A47) | 100 m | |
| Exit the traffic circle onto Eye Road (A47) | 450 m | |
| Enter Dogsthorpe Roundabout and take the 2nd exit onto Soke Parkway (A47) | 150 m | |
| Exit the traffic circle onto Soke Parkway (A47) | 6 km | |
| Take the ramp on the left onto A47 | 200 m | |
| Keep left onto A47 | 200 m | |
| Merge right onto Nene Parkway (A1260) | 3.5 km | |
| Enter Hampton Roundabout and take the 3rd exit | 250 m | |
| Exit the traffic circle | 350 m | |
| Merge right onto Fletton Parkway (A1139) | 3.5 km | |
| Take the ramp on the left towards A1(M): The SOUTH | 450 m | |
| Merge right onto Great North Road (A1(M)) | 15 km | |
| Keep right onto A1(M) | 7 km | |
| Take the ramp on the left onto A14 | 25 km | |
| Keep right onto Huntingdon Road (A14) | 550 m | |
| Continue onto M11 | 80 km | |
| Take the ramp towards A406(W): N Circular | 150 m | |
| Keep left towards A406(S): N Circular | 900 m | |
| Merge right onto North Circular Road (A406) | 900 m | |
| Take the ramp on the left towards A12: Central London | 450 m | |
| Enter Redbridge Roundabout and take the 5th exit onto Eastern Avenue (A12) | 350 m | |
| Exit the traffic circle onto Eastern Avenue (A12) | 5.5 km | |
| Continue onto East Cross Route (A12) | 2.5 km | |
| Take the ramp on the left onto A12 | 350 m | |
| Turn right onto Wick Lane (B142) | 45 m | |
| Turn right onto Tredegar Road (B142) | 250 m | |
| Turn right onto Parnell Road (B142) | 250 m | |
| Turn left onto Roman Road (B119) | 450 m | |
| Turn left onto Roman Road (B119) | 1.5 km | |
| Turn right onto Cambridge Heath Road (A107) | 15 m | |
| Turn left onto Bethnal Green Road (A1209) | 1.5 km | |
| Turn left onto Shoreditch High Street (A10) | 250 m | |
| Continue onto Norton Folgate (A10) | 100 m | |
| Turn right onto Primrose Street | 200 m | |
| Turn left onto Appold Street | 150 m | |
| Continue onto Sun Street (B100) | 300 m | |
| Continue onto Chiswell Street (B100) | 350 m | |
| Continue onto Beech Street (B100) | 350 m | |
| Continue onto Long Lane | 400 m | |
| Turn right onto East Poultry Avenue | 100 m | |
| Turn left onto Charterhouse Street | 350 m | |
| Continue onto New Fetter Lane (A4) | 250 m | |
| Continue onto Fetter Lane (A4) | 200 m | |
| Turn right onto Fleet Street (A4) | 200 m | |
| Continue onto Strand (A4) | 200 m | |
| Turn right onto Aldwych (A4) | 450 m | |
| Continue onto Strand (A4) | 700 m | |
| Enter Charing Cross and exit onto Charing Cross | 35 m | |
| You have arrived at your destination | 0 m |
Portsmouth - Cherbourg, Autoroute de Normandie
805.7 km, 12 h 55 min
| Head southwest | 30 m | |
| Turn right onto South End (A1138) | 200 m | |
| Merge right onto Haven Bridge (A16) | 60 m | |
| Continue onto John Adams Way (A16) | 250 m | |
| Enter the traffic circle and take the 1st exit onto Spalding Road (A16) | 5.5 m | |
| Exit the traffic circle onto Spalding Road (A16) | 1 km | |
| Enter the traffic circle and take the 2nd exit onto A16 | 25 m | |
| Exit the traffic circle onto A16 | 200 m | |
| Enter the traffic circle and take the 2nd exit onto A16 | 40 m | |
| Exit the traffic circle onto A16 | 1 km | |
| Enter the traffic circle and take the 2nd exit onto A16 | 60 m | |
| Exit the traffic circle onto A16 | 3.5 km | |
| Enter the traffic circle and take the 2nd exit onto A16 | 25 m | |
| Exit the traffic circle onto A16 | 4.5 km | |
| Enter Sutterton Roundabout and take the 2nd exit onto A16 | 55 m | |
| Exit the traffic circle onto A16 | 5.5 km | |
| Enter the traffic circle and take the 1st exit onto A16 | 20 m | |
| Exit the traffic circle onto A16 | 4 km | |
| Enter the traffic circle and take the 1st exit onto Spalding Bypass (A16) | 30 m | |
| Exit the traffic circle onto Spalding Bypass (A16) | 2 km | |
| Enter Springfields Roundabout and take the 2nd exit onto Spalding Bypass (A16) | 50 m | |
| Exit the traffic circle onto Spalding Bypass (A16) | 1 km | |
| Enter the traffic circle and take the 2nd exit onto Spalding Bypass (A16) | 40 m | |
| Exit the traffic circle onto Spalding Bypass (A16) | 4 km | |
| Enter the traffic circle and take the 1st exit onto Crowland Bypass (A16) | 8 m | |
| Exit the traffic circle onto Crowland Bypass (A16) | 3 km | |
| Enter the traffic circle and take the 2nd exit onto Crowland Bypass (A16) | 45 m | |
| Exit the traffic circle onto Crowland Bypass (A16) | 10 km | |
| Enter the traffic circle and take the 2nd exit onto A16 | 55 m | |
| Exit the traffic circle onto A16 | 3.5 km | |
| Enter the traffic circle and take the 2nd exit onto A16 | 50 m | |
| Exit the traffic circle onto A16 | 4 km | |
| Enter the traffic circle and take the 3rd exit onto Eye Road (A47) | 100 m | |
| Exit the traffic circle onto Eye Road (A47) | 450 m | |
| Enter Dogsthorpe Roundabout and take the 2nd exit onto Soke Parkway (A47) | 150 m | |
| Exit the traffic circle onto Soke Parkway (A47) | 6 km | |
| Take the ramp on the left onto A47 | 200 m | |
| Keep left onto A47 | 200 m | |
| Merge right onto Nene Parkway (A1260) | 3.5 km | |
| Enter Hampton Roundabout and take the 3rd exit | 250 m | |
| Exit the traffic circle | 350 m | |
| Merge right onto Fletton Parkway (A1139) | 3.5 km | |
| Take the ramp on the left towards A1(M): The SOUTH | 450 m | |
| Merge right onto Great North Road (A1(M)) | 15 km | |
| Keep right onto A1(M) | 10 km | |
| Enter Buckden Roundabout and take the 2nd exit onto A1 | 55 m | |
| Exit the traffic circle onto A1 | 15 km | |
| Turn left to stay on Great North Road (A1) | 3.5 km | |
| Continue onto Tempsford Road (A1) | 3 km | |
| Enter Sandy Roundabout and take the 2nd exit onto Great North Road (A1) | 50 m | |
| Exit the traffic circle onto Great North Road (A1) | 4 km | |
| Continue onto Biggleswade Bypass (A1) | 500 m | |
| Enter Biggleswade North Roundabout and take the 2nd exit onto Biggleswade Bypass (A1) | 55 m | |
| Exit the traffic circle onto Biggleswade Bypass (A1) | 3.5 km | |
| Enter Biggleswade South Roundabout and take the 2nd exit onto London Road (A1) | 70 m | |
| Exit the traffic circle onto London Road (A1) | 40 km | |
| Take the ramp on the left towards A414: St Albans | 550 m | |
| Enter Roehyde Interchange and take the 2nd exit onto North Orbital Road (A414) | 200 m | |
| Exit the traffic circle onto North Orbital Road (A414) | 2 km | |
| Keep left onto North Orbital Road (A414) | 2.5 km | |
| Enter London Colney Roundabout and take the 2nd exit onto North Orbital Road (A414) | 150 m | |
| Exit the traffic circle onto North Orbital Road (A414) | 3 km | |
| Enter Park Street Roundabout and take the 2nd exit onto North Orbital Road (A405) | 50 m | |
| Exit the traffic circle onto North Orbital Road (A405) | 900 m | |
| Enter the traffic circle and take the 2nd exit onto North Orbital Road (A405) | 30 m | |
| Exit the traffic circle onto North Orbital Road (A405) | 1 km | |
| Enter the traffic circle and take the 1st exit onto North Orbital Road (A405) | 40 m | |
| Exit the traffic circle onto North Orbital Road (A405) | 700 m | |
| Enter Bricket Wood Junction and take the 3rd exit towards M25: Heathrow | 200 m | |
| Exit the traffic circle towards M25: Heathrow | 55 km | |
| Take the ramp on the left towards A3: London (SW) | 350 m | |
| Enter Wisley Interchange and take the 3rd exit onto A3 | 250 m | |
| Exit the traffic circle onto A3 | 900 m | |
| Merge right onto Portsmouth Road (A3) | 1 km | |
| Continue onto Ripley By-Pass (A3) | 10 km | |
| Continue onto Guildford and Godalming Bypass (A3) | 8 km | |
| Continue onto Milford By-Pass (A3) | 2 km | |
| Continue onto Portsmouth Road (A3) | 5 km | |
| Continue onto Tunnel Way (A3) | 5 km | |
| Continue onto Portsmouth Road (A3) | 3.5 km | |
| Continue onto Liphook and Petersfield Bypass (A3) | 9 km | |
| Enter Ham Barn Roundabout and take the 2nd exit onto Liphook and Petersfield Bypass (A3) | 70 m | |
| Exit the traffic circle onto Liphook and Petersfield Bypass (A3) | 10 km | |
| Continue onto London Road (A3) | 15 km | |
| Continue onto A27 | 3.5 km | |
| Continue onto M27 | 1 km | |
| Take exit 12 on the left towards M275: Portsmouth | 900 m | |
| Merge right onto M275 | 2 km | |
| Take exit 2 on the left towards Cruise and Cross Channel Ferries | 500 m | |
| Enter Rudmore Roundabout and take the 4th exit | 200 m | |
| Exit the traffic circle | 60 m | |
| Turn left | 55 m | |
| Turn right | 25 m | |
| Keep right at the fork | 250 m | |
| Make a slight left | 350 m | |
| Take the ferry Portsmouth - Cherbourg | 150 km | |
| Continue straight | 100 m | |
| Continue slightly left onto Sortie Portuaire | 250 m | |
| Keep left onto Sortie Portuaire | 25 m | |
| Keep right at the fork | 150 m | |
| Go straight onto Sortie Portuaire | 800 m | |
| Enter Rond-Point des Mielles and take the 2nd exit | 90 m | |
| Exit the traffic circle | 60 m | |
| Go straight onto Voie Portuaire | 550 m | |
| Enter Rond-Point de la Pyrotechnie and take the 1st exit onto Rue Aristide Briand | 15 m | |
| Exit the traffic circle onto Rue Aristide Briand | 700 m | |
| Turn left onto Rue Médéric | 200 m | |
| Continue onto Rue Gambetta | 400 m | |
| Turn right onto Avenue des Prairies | 700 m | |
| Enter Rond-Point de Penesme and take the 2nd exit onto Axe Nord-Sud (N 13) | 50 m | |
| Exit the traffic circle onto Axe Nord-Sud (N 13) | 4.5 km | |
| Enter Rond-Point André Malraux and take the 3rd exit onto N 13 | 150 m | |
| Exit the traffic circle onto N 13 | 100 km | |
| Continue onto Périphérique Nord (N 814) | 9 km | |
| Continue onto Périphérique Nord (N 814) | 1.5 km | |
| Take the ramp towards Deauville-Trouville | 450 m | |
| Keep left towards A 13: Deauville-Trouville | 200 km | |
| Keep left towards Nanterre | 20 km | |
| Continue onto Pont de Neuilly (N 13) | 2 km | |
| Keep right onto Avenue Charles de Gaulle | 250 m | |
| Continue onto Avenue de Neuilly | 100 m | |
| Continue onto Place de la Porte Maillot | 250 m | |
| Continue onto Avenue de la Grande Armée | 800 m | |
| Enter Place Charles de Gaulle and take the 6th exit onto Avenue des Champs-Élysées | 200 m | |
| Exit the traffic circle onto Avenue des Champs-Élysées | 1 km | |
| Enter Rond-point des Champs-Élysées-Marcel-Dassault and take the 2nd exit onto Avenue des Champs-Élysées | 60 m | |
| Exit the traffic circle onto Avenue des Champs-Élysées | 700 m | |
| Turn right | 250 m | |
| Go straight onto Voie Georges-Pompidou | 150 m | |
| Go straight onto Quai des Tuileries | 250 m | |
| Continue onto Quai Aimé Césaire | 400 m | |
| Continue onto Quai François Mitterrand | 800 m | |
| Continue onto Quai du Louvre | 200 m | |
| Continue onto Quai de la Mégisserie | 350 m | |
| Continue onto Quai de Gesvres | 300 m | |
| Continue onto Quai de l'Hôtel de Ville | 150 m | |
| Turn left onto Rue de Lobau | 200 m | |
| Turn left onto Rue de Rivoli | 100 m | |
| Turn left | 5.5 m | |
| You have arrived at your destination, straight ahead | 0 m |
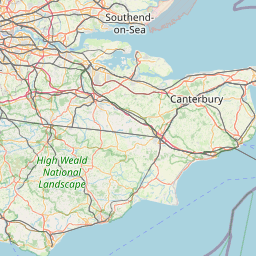
Autoroute des Anglais, Autoroute du Nord
645.1 km, 7 h 19 min
| Head southwest | 30 m | |
| Turn right onto South End (A1138) | 200 m | |
| Merge right onto Haven Bridge (A16) | 60 m | |
| Continue onto John Adams Way (A16) | 250 m | |
| Enter the traffic circle and take the 1st exit onto Spalding Road (A16) | 5.5 m | |
| Exit the traffic circle onto Spalding Road (A16) | 1 km | |
| Enter the traffic circle and take the 2nd exit onto A16 | 25 m | |
| Exit the traffic circle onto A16 | 200 m | |
| Enter the traffic circle and take the 2nd exit onto A16 | 40 m | |
| Exit the traffic circle onto A16 | 1 km | |
| Enter the traffic circle and take the 2nd exit onto A16 | 60 m | |
| Exit the traffic circle onto A16 | 3.5 km | |
| Enter the traffic circle and take the 2nd exit onto A16 | 25 m | |
| Exit the traffic circle onto A16 | 4.5 km | |
| Enter Sutterton Roundabout and take the 2nd exit onto A16 | 55 m | |
| Exit the traffic circle onto A16 | 5.5 km | |
| Enter the traffic circle and take the 1st exit onto A16 | 20 m | |
| Exit the traffic circle onto A16 | 4 km | |
| Enter the traffic circle and take the 1st exit onto Spalding Bypass (A16) | 30 m | |
| Exit the traffic circle onto Spalding Bypass (A16) | 2 km | |
| Enter Springfields Roundabout and take the 2nd exit onto Spalding Bypass (A16) | 50 m | |
| Exit the traffic circle onto Spalding Bypass (A16) | 1 km | |
| Enter the traffic circle and take the 2nd exit onto Spalding Bypass (A16) | 40 m | |
| Exit the traffic circle onto Spalding Bypass (A16) | 4 km | |
| Enter the traffic circle and take the 1st exit onto Crowland Bypass (A16) | 8 m | |
| Exit the traffic circle onto Crowland Bypass (A16) | 3 km | |
| Enter the traffic circle and take the 2nd exit onto Crowland Bypass (A16) | 45 m | |
| Exit the traffic circle onto Crowland Bypass (A16) | 10 km | |
| Enter the traffic circle and take the 2nd exit onto A16 | 55 m | |
| Exit the traffic circle onto A16 | 3.5 km | |
| Enter the traffic circle and take the 2nd exit onto A16 | 50 m | |
| Exit the traffic circle onto A16 | 4 km | |
| Enter the traffic circle and take the 3rd exit onto Eye Road (A47) | 100 m | |
| Exit the traffic circle onto Eye Road (A47) | 450 m | |
| Enter Dogsthorpe Roundabout and take the 2nd exit onto Soke Parkway (A47) | 150 m | |
| Exit the traffic circle onto Soke Parkway (A47) | 6 km | |
| Take the ramp on the left onto A47 | 200 m | |
| Keep left onto A47 | 200 m | |
| Merge right onto Nene Parkway (A1260) | 3.5 km | |
| Enter Hampton Roundabout and take the 3rd exit | 250 m | |
| Exit the traffic circle | 350 m | |
| Merge right onto Fletton Parkway (A1139) | 3.5 km | |
| Take the ramp on the left towards A1(M): The SOUTH | 450 m | |
| Merge right onto Great North Road (A1(M)) | 15 km | |
| Keep right onto A1(M) | 7 km | |
| Take the ramp on the left onto A14 | 25 km | |
| Keep right onto Huntingdon Road (A14) | 550 m | |
| Continue onto M11 | 70 km | |
| Take the ramp on the left towards M25 | 400 m | |
| Keep left towards M25: (M20 | 450 m | |
| Keep left towards M25: (M20 | 25 km | |
| Continue towards M25: (M20 | 8 km | |
| Take the ramp on the left towards A2: (M2) Canterbury | 1.5 km | |
| Merge right onto Dartford Bypass (A2) | 3 km | |
| Continue onto Watling Street (A2) | 10 km | |
| Continue onto M2 | 9 km | |
| Take the ramp on the left onto M2 | 600 m | |
| Enter Taddington Roundabout and take the 3rd exit onto A229 | 250 m | |
| Exit the traffic circle onto A229 | 350 m | |
| Enter Lord Lees Roundabout and take the 1st exit | 5 m | |
| Exit the traffic circle | 300 m | |
| Continue onto A229 | 3 km | |
| Take the ramp on the left | 500 m | |
| Keep right at the fork | 100 m | |
| Enter Cobtree Roundabout and take the 1st exit towards Ashford | 8 m | |
| Exit the traffic circle towards Ashford | 50 km | |
| Take the ramp on the left towards Channel Tunnel | 400 m | |
| Keep right at the fork | 1.5 km | |
| Go straight onto FlexiPlus | 250 m | |
| Continue onto Boulevard d'Erlanger | 800 m | |
| Keep right at the fork | 15 m | |
| Keep right at the fork | 900 m | |
| Continue onto Over Bridge 2 | 200 m | |
| Turn left | 90 m | |
| Make a slight right | 20 m | |
| Take the ferry Le Shuttle | 60 km | |
| Make a slight right | 150 m | |
| Turn right | 1 km | |
| Keep right towards Calais Centre | 1 km | |
| Enter Giratoire du Chantier du Siècle and take the 1st exit onto Boulevard de l'Europe | 25 m | |
| Exit the traffic circle onto Boulevard de l'Europe | 900 m | |
| Enter Giratoire de l'Europe and take the 2nd exit towards A 16 | 100 m | |
| Exit the traffic circle towards A 16 | 200 m | |
| Enter the traffic circle and take the 1st exit towards Dunkerque | 30 m | |
| Exit the traffic circle towards Dunkerque | 400 m | |
| Merge left onto L'Européenne (A 16) | 4 km | |
| Take the ramp towards St Omer | 900 m | |
| Merge right onto Autoroute des Anglais (A 26) | 100 km | |
| Take the ramp towards A 1: Arras-est | 700 m | |
| Keep left at the fork | 700 m | |
| Merge left onto Autoroute du Nord (A 1) | 150 km | |
| Keep left towards St-Denis centre | 7 km | |
| Keep right towards Paris centre | 250 m | |
| Turn right onto Boulevard Ney | 200 m | |
| Keep right onto Boulevard Ney | 900 m | |
| Turn left onto Boulevard Ornano | 800 m | |
| Continue onto Boulevard Barbès | 900 m | |
| Make a slight left onto Boulevard de Magenta | 1.5 km | |
| Turn right onto Rue du Faubourg Saint-Martin | 550 m | |
| Continue straight onto Carrefour des Théâtres | 35 m | |
| Turn left onto Rue Saint-Martin | 350 m | |
| Turn left onto Rue Réaumur | 150 m | |
| Turn right onto Rue Beaubourg | 600 m | |
| Continue onto Rue du Renard | 250 m | |
| Turn left onto Rue de la Verrerie | 90 m | |
| Turn right onto Rue du Temple | 90 m | |
| Go straight | 5.5 m | |
| You have arrived at your destination, straight ahead | 0 m |
From
To
Distance:
| Cities | Distance |
|---|---|
| Boston, Lincolnshire, United Kingdom to Istanbul, Istanbul, Turkey | 1,579.93 mi (2,542.65 km) |
| Boston, Lincolnshire, United Kingdom to London, Westminster, United Kingdom | 101.45 mi (163.26 km) |
| Boston, Lincolnshire, United Kingdom to Paris, Paris, France | 302.64 mi (487.05 km) |
| Boston, Lincolnshire, United Kingdom to Madrid, Madrid, Spain | 884.68 mi (1,423.75 km) |
| Boston, Lincolnshire, United Kingdom to Ankara, Ankara, Turkey | 1,783.11 mi (2,869.63 km) |
12345
 Accedi con Google